Retro Christmas Toy Factory 3D Paper Cut: A Timeless Holiday Craft for Modern Creators
As the holiday season approaches, crafters are on the lookout for unique and nostalgic ways to celebrate. The Retro Christmas Toy Factory 3D Paper Cut offers a perfect blend of vintage charm and modern crafting convenience. This layered paper cutting template is designed to bring the festive spirit into your home or workshop with minimal effort and maximum impact. Whether you're an experienced crafter or just starting out, this design can be adapted to suit a variety of projects and styles.
What You Need to Know About the Retro Christmas Toy Factory 3D Paper Cut
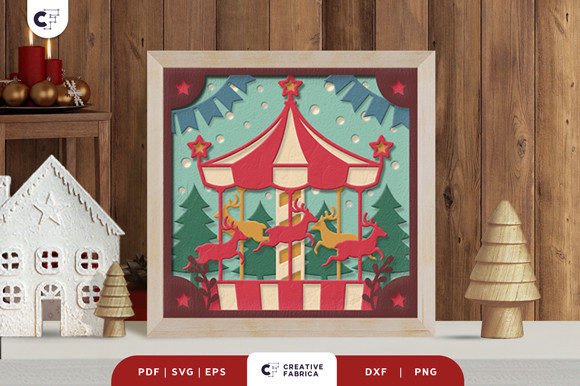
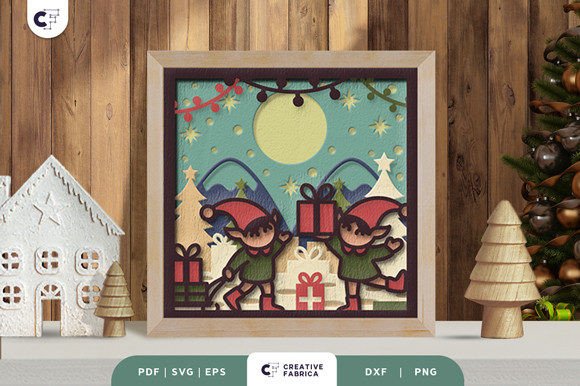
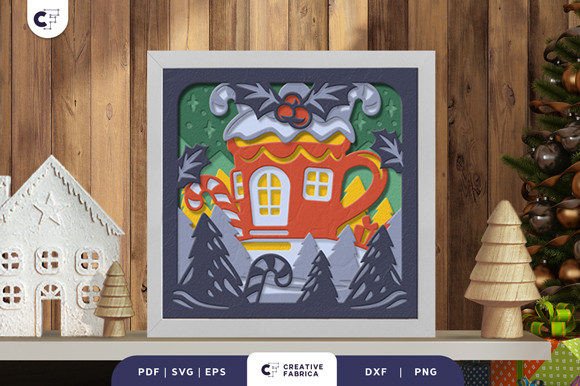
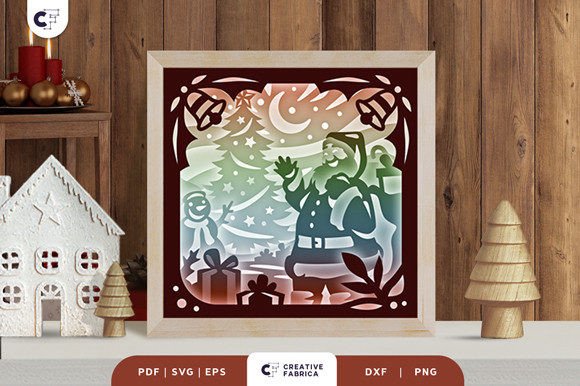
The Retro Christmas Toy Factory 3D Paper Cut is more than just a printable design — it's a complete crafting solution that combines artistry and functionality. With ten layers included in the template, this design captures the intricate details of a classic toy factory scene, making it ideal for creating eye-catching decorations that stand out during the holidays.
The template is available in multiple file formats including SVG, PDF, EPS, PNG, and DXF. These formats allow for seamless integration into various crafting tools and software. Most notably, the SVG file is optimized for use with popular electronic cutting machines like Silhouette and Cricut, enabling precise and efficient cuts every time. However, if you don’t have access to such devices, the design is also suitable for manual cutting using an art knife and scissors.
Dimensions and Material Recommendations
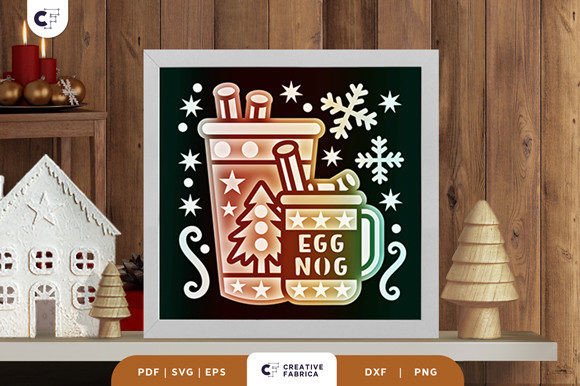
This particular 3D paper cut measures 20.32×20.32 cm (8x8 inches), making it a compact yet detailed piece. Its square format is especially useful for matching frames, shadow boxes, or even custom light boxes. To ensure durability and a professional finish, the recommended material is Encore Cardstock 80 lb cover (216 gsm). This heavy-weight cardstock holds up well under layering and gluing, maintaining the structure and beauty of the final product.
If you’re interested in purchasing this specific type of cardstock, you can find it at the 12×12 Cardstock Shop. While this is a paid link, it connects directly to the recommended material, helping you streamline your shopping and crafting process.
How to Use the Template Effectively
One of the best aspects of the Retro Christmas Toy Factory 3D Paper Cut is its versatility. Here are some practical ways to incorporate it into your holiday crafting:
- Framed Wall Art: Once all layers are cut and assembled, simply place the finished design into a standard picture frame. It makes a beautiful and conversation-starting addition to any room.
- Light Box Decoration: For a more dynamic effect, insert LED strips between the layers. When illuminated, the design casts a warm glow and enhances the depth of the image, turning it into a magical centerpiece.
- Gift Packaging: Attach the 3D paper cut to a gift box or present it as part of a DIY gift kit. It adds a personal touch that’s sure to impress anyone who loves handmade items.
- Holiday Cards or Ornaments: Smaller versions of the design can be printed and used to embellish greeting cards or create festive 3D ornaments for the tree.
Regardless of the project you choose, the key is to maintain the aspect ratio when resizing the SVG file. This ensures the proportions remain accurate and the layers align correctly once assembled.
Tools and Supplies You'll Need
To bring your Retro Christmas Toy Factory 3D Paper Cut to life, you’ll need a few essential supplies:
- Cutting Tools: Either a Silhouette or Cricut machine, or a sharp hobby knife and precision ruler.
- Paper: High-quality cardstock like Encore 80 lb cover is recommended for best results.
- Adhesive: Choose either glue or double-sided tape depending on your preference and the weight of the paper you're using.
- Frame or Light Box: Decide whether you want to display your creation in a traditional frame or add a modern twist with LED lighting.
These materials are widely available online or at local craft stores, so you can easily gather everything needed for your project. If you're working with children or beginners, opting for a less complicated assembly method might be beneficial. Conversely, if you're looking to challenge yourself, experimenting with different lighting setups can elevate the final piece significantly.
Why This Design Stands Out
Unlike many mass-produced holiday decorations, the Retro Christmas Toy Factory 3D Paper Cut allows for customization and creativity. Each layer contributes to the overall aesthetic, and you can choose colors or patterns that match your personal style or home décor. This level of personalization makes it an excellent choice for those who want their holiday displays to reflect individuality rather than generic store-bought designs.
Moreover, the retro theme taps into a growing trend in holiday crafts — people are increasingly seeking designs that evoke nostalgia and remind them of Christmases past. The toy factory motif is particularly appealing because it brings back memories of childhood joy, family traditions, and the magic of the season.
Common Considerations Before Crafting
Before diving into your project, there are a few factors to keep in mind:
- Color Variation: As noted, the images provided are for preview purposes only. Lighting sources and paper types can affect how the final product looks, so always test colors on your chosen material before committing to a full set of layers.
- Time Investment: While the design is user-friendly, assembling ten layers does require patience and attention to detail. Plan accordingly, especially if you're aiming to complete multiple pieces for gifts or events.
- Storage and Display: Consider where you’ll display your finished decoration. If it’s going to be a wall hanging, make sure the frame is sturdy enough. For light boxes, check the thickness of the layers to avoid overloading the space between them.
Despite these considerations, the end result is often worth the effort. Many crafters report that the satisfaction of seeing a completed 3D paper cut come together is unmatched, especially when the design has sentimental value or a strong visual appeal.
Incorporating Into Modern Workflows
With the rise of digital crafting, templates like the Retro Christmas Toy Factory 3D Paper Cut are becoming essential tools for hobbyists and professionals alike. Digital files allow for quick adjustments, batch printing, and easy sharing with others in your crafting community. This makes the template not only a great standalone project but also a valuable resource for educators, small businesses, and event planners looking to offer personalized holiday décor options.
For example, a boutique selling handmade holiday items could use this template to produce limited-edition framed prints or customizable light boxes. Similarly, teachers or activity coordinators might use it for classroom or group projects, encouraging participants to explore layering techniques and color coordination while staying within a manageable timeframe.
Practical Benefits for Every Crafter
There are several reasons why the Retro Christmas Toy Factory 3D Paper Cut is gaining popularity among crafters:
- Easy Assembly: Despite having ten layers, the design is structured in a way that simplifies the gluing and stacking process.
- Reusable Files: The SVG format means you can reuse the design across multiple projects without losing quality.
- Customizable Color Schemes: Print the design on colored cardstock or paint individual layers to match your holiday palette.
- Perfect Gift Idea: Handmade gifts are highly valued, and this design can be tailored to suit different recipients, from friends to family members.
Additionally, the ability to resize the design opens up new possibilities. Want to create a larger version for a mantel or entryway? Just scale it appropriately and adjust the spacing between layers. This flexibility is a major advantage over traditional hand-drawn or purchased 3D paper cuts.
Final Tips for Success
To get the most out of your Retro Christmas Toy Factory 3D Paper Cut, consider the following tips:
- Print each layer separately to ensure clarity and alignment.
- Use a ruler and straight edge when cutting manually to avoid uneven edges.
- Work in a clean, dust-free area to prevent debris from affecting the adhesive bond.
- Test the lighting setup before final assembly if you plan to use LEDs.
- Store unused layers flat to prevent curling or bending.
By taking these steps, you’ll increase the chances of achieving a clean, professional look that highlights the charm of the design. Remember, practice makes perfect — if you're new to layered paper cuts, try a smaller project first to build confidence before tackling the full ten-layer version.
Where to Start Your Project
Now that you understand the potential of the Retro Christmas Toy Factory 3D Paper Cut, it’s time to start planning your own creation. Gather your materials, decide on a display method, and let the holiday spirit guide your crafting choices. Whether you opt for a simple frame or a glowing light box, the outcome will be a unique and meaningful decoration that stands out from the rest.
With the right tools and a bit of creativity, this template can become a cherished part of your holiday tradition. So, roll out your cardstock, load your cutting machine, or sharpen your scissors — the Retro Christmas Toy Factory 3D Paper Cut is waiting to bring your vision to life.